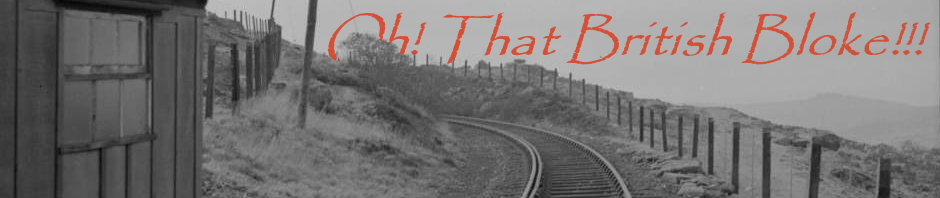

The basic model – 2mm MDF and DAS clay chips
Manufacturing and applying hundreds, if not thousands of clay chips to represent rough hewn granite blocks certainly gives a very nice authentic appearance.
But frankly, covering possibly hundreds of square inches in this manner would pretty much define my spare time for the foreseeable future.
So the rest of the major structures on the layout – the reservoir dam, the rail bridge and Boltorr road over-bridge, will be built using plastic card embossed with a more dressed stone pattern.
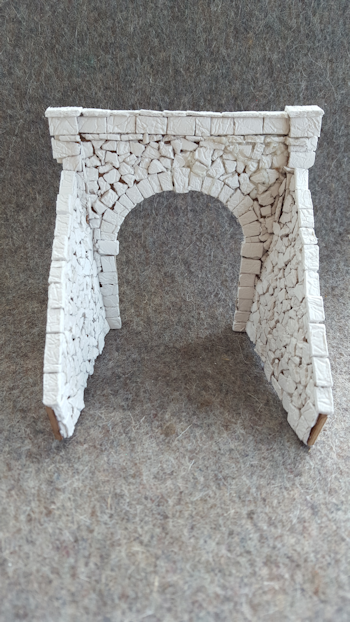
First coat dark grey acrylic
The more modern features will look as if they were built by skilled Victorian masons.
Anyway, that’s my excuse.
The basic structure was fabricated from 2mm MDF and random pieces of very thin chip made from DAS clay.
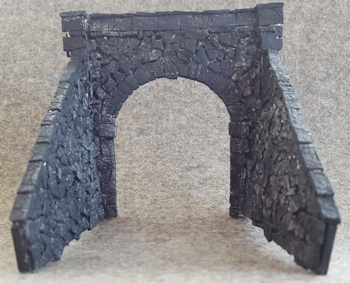
Thin dilute wash of off-white acrylic to define mortar and give some tonal variation. The darker area over the portal is where the train smoke stains the stones
The layers of very thin clay was then broken into appropriately sized chips to represent individual granite blocks. Dressed stones required on the arch and elsewhere were cut out with a pair of side snips.
The individual blocks were applied by spreading a thin layer of PVA glue onto the surface of the MDF, about an inch square at a time. The PVA causes the edges of the clay chips to become a little softened so it’s easy to get blocks to cosy up to each other in quite a realistic way, using a pair of tweezers to position the chips.
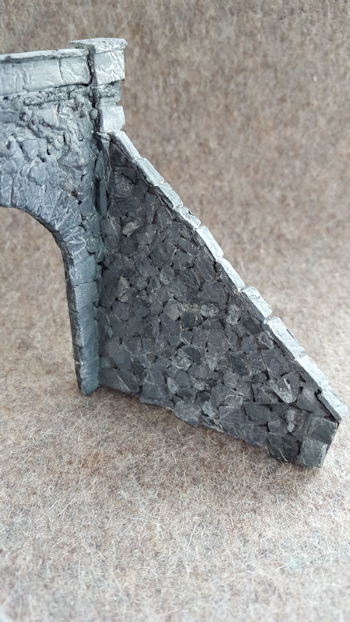
Individual stones picked out in various granite tones
Once again, let the model completely dry out. Believe me, the MDF and clay soaks up a lot of liquid which takes many hours to dry.
I represented mortar and other general weathering and variation by thoroughly mixing up a small batch of whitish acrylic paint – 1 part paint / 2 part water + 1 drop of dish soap / washing-up-liquid – in a small dropper bottle.
To treat a surface I laid it horizontally on the bench and just dripped the wash onto the surface and let it soak in and dry. I repeated this process a couple of times on each surface until I got the result I wanted.
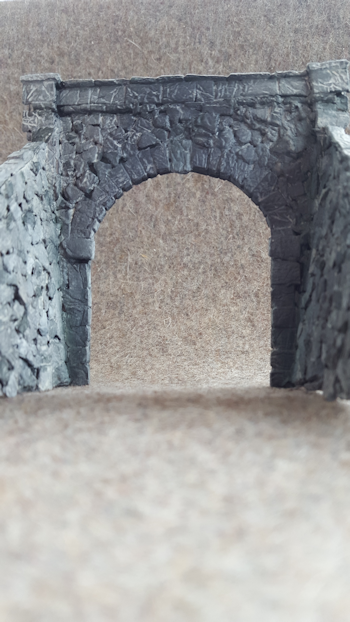
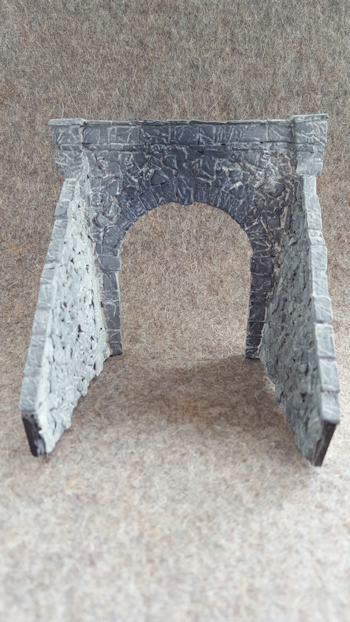
“Eye level” view of portal with some weathering and ready for locating on layout
Once this was all dry – another couple of days – I picked out some random blocks and used a tiny paint brush and some black and white paint on a palette to give some more variation to the surface of the blocks.
It might have been better to have done this during the adding “mortar” stage, but it seemed to blend in with a bit of buffing with a dry, stiff brush.
The portal is now at the point where I can fit it onto the layout and blend in the landscape around it. It needs a little more weathering work, water and mineral stains, and once in situ a couple of plants/ferns growing in niches to add a little more detail.
Anyway. If I can do it, so can you.